How to take screenshots and make movies
GUI control
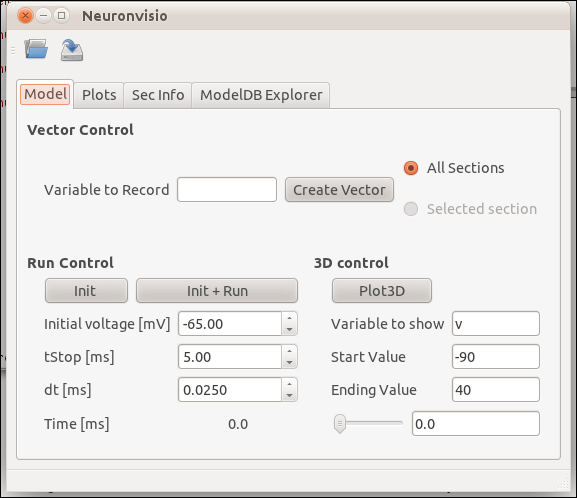
This is the Controls window. You can create vectors and run simulations. The time shows you the time of the NEURON simulator.
You can change the tstop, the dt and the initial voltage from the GUI or the console.
3-D rendering
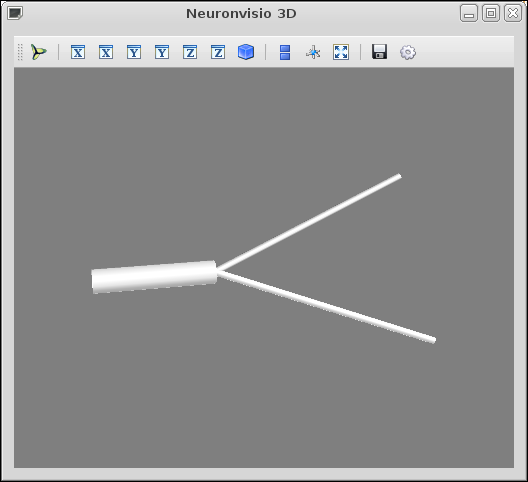
Rendering of a simple model with 3 section.
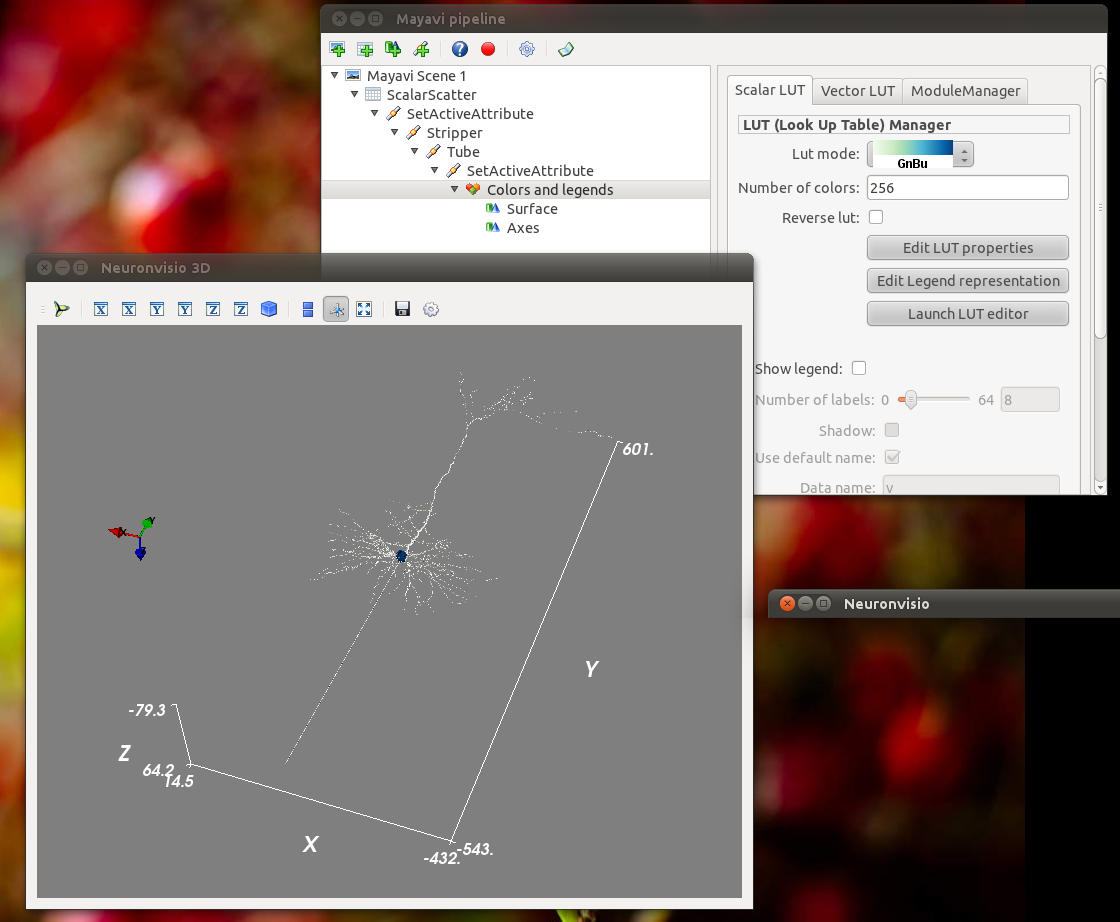
The neurons is rendered using the Mayavi pipeline, where is possibile to choose from different colormap and additional filters. Using the GnBu colormap with the Axes.
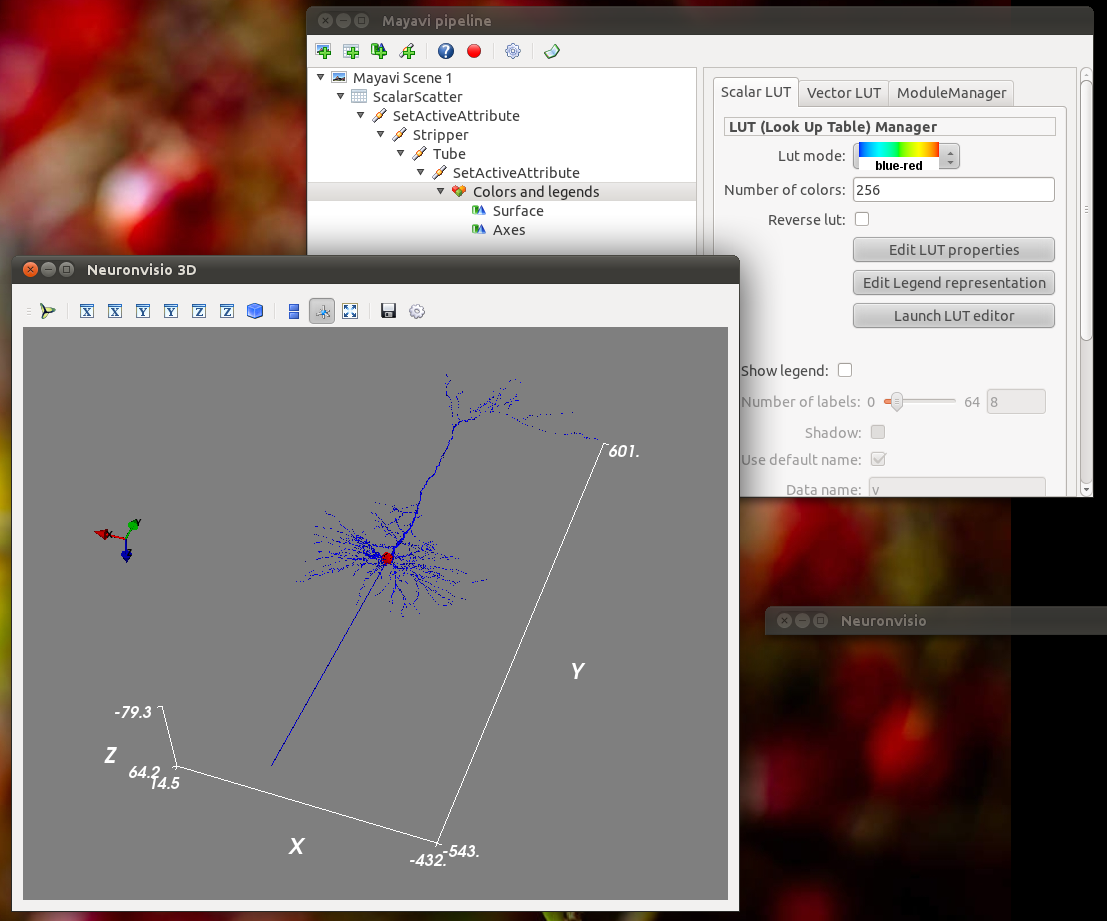
Using the red-blue colormap with the Axes.
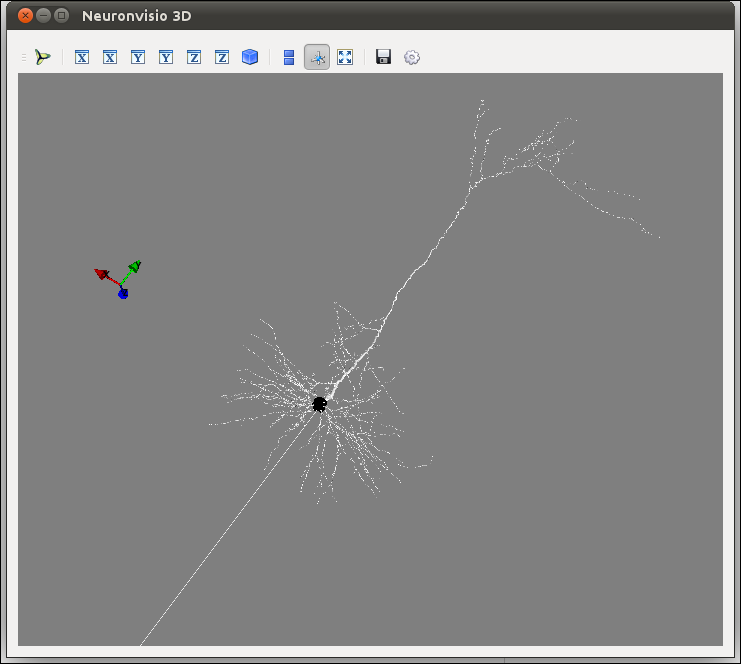
3-rendering of a 3d-points reconstructed model
Rendering of a more complex model, a pyramidal neuron.
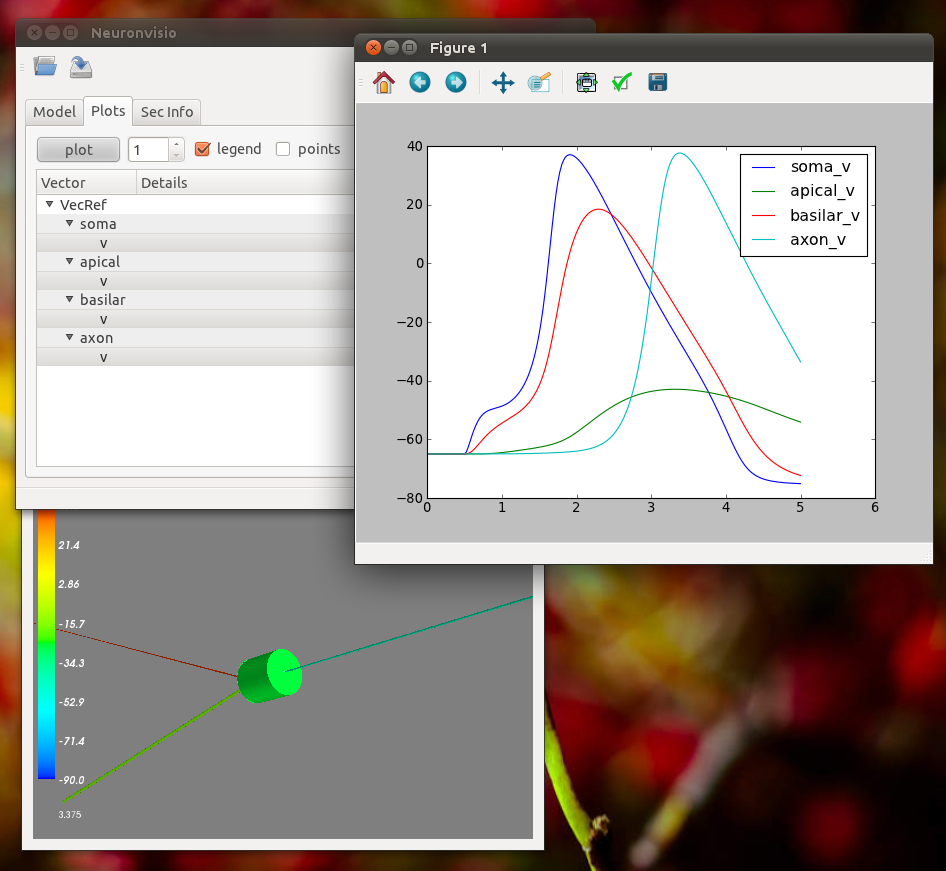
Timecourse movie and pylab graphs
It is possible to follow the timecourse of a variable in the whole neuron or networks using the bottom slider, after the simulation has been ran, or reloaded. If a particular point in time is of interest, insert in the animation Time line textfield and hit return.
The pylab graphs are integrated and can be easily generated with a click. For example here we shows hhow the voltage change in a simple model and in a pyramidal one.
Pyramidal neuron
The propagation of the voltage among the neuron. The stimuli was given in the soma.
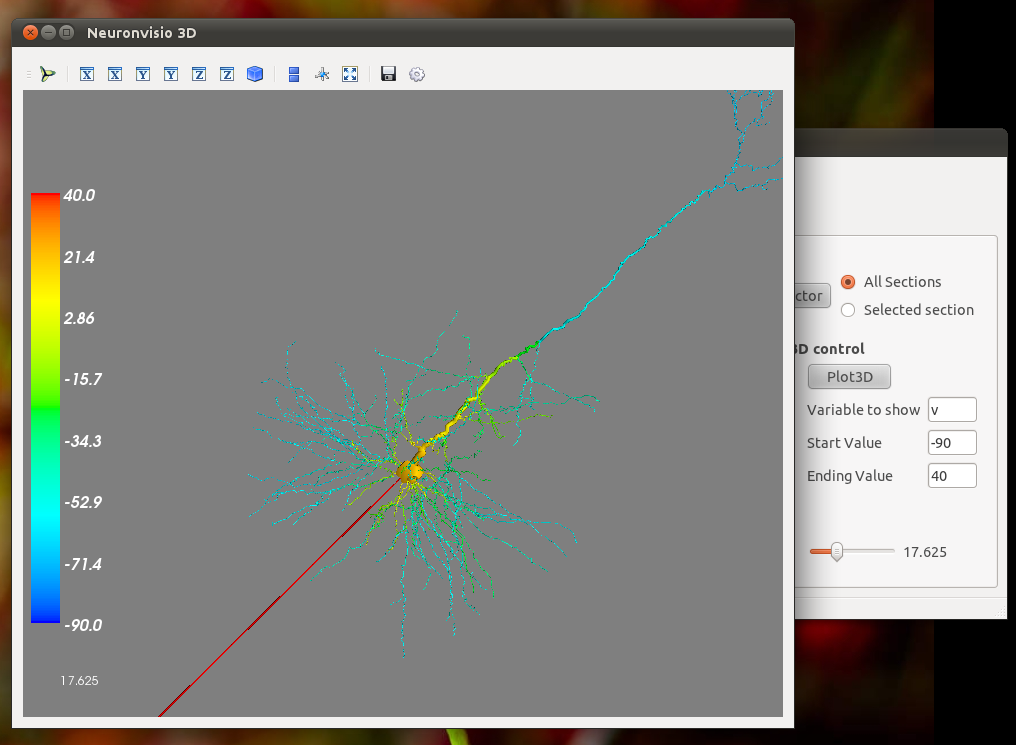
The pyramidal example is shipped with Neuronvisio.
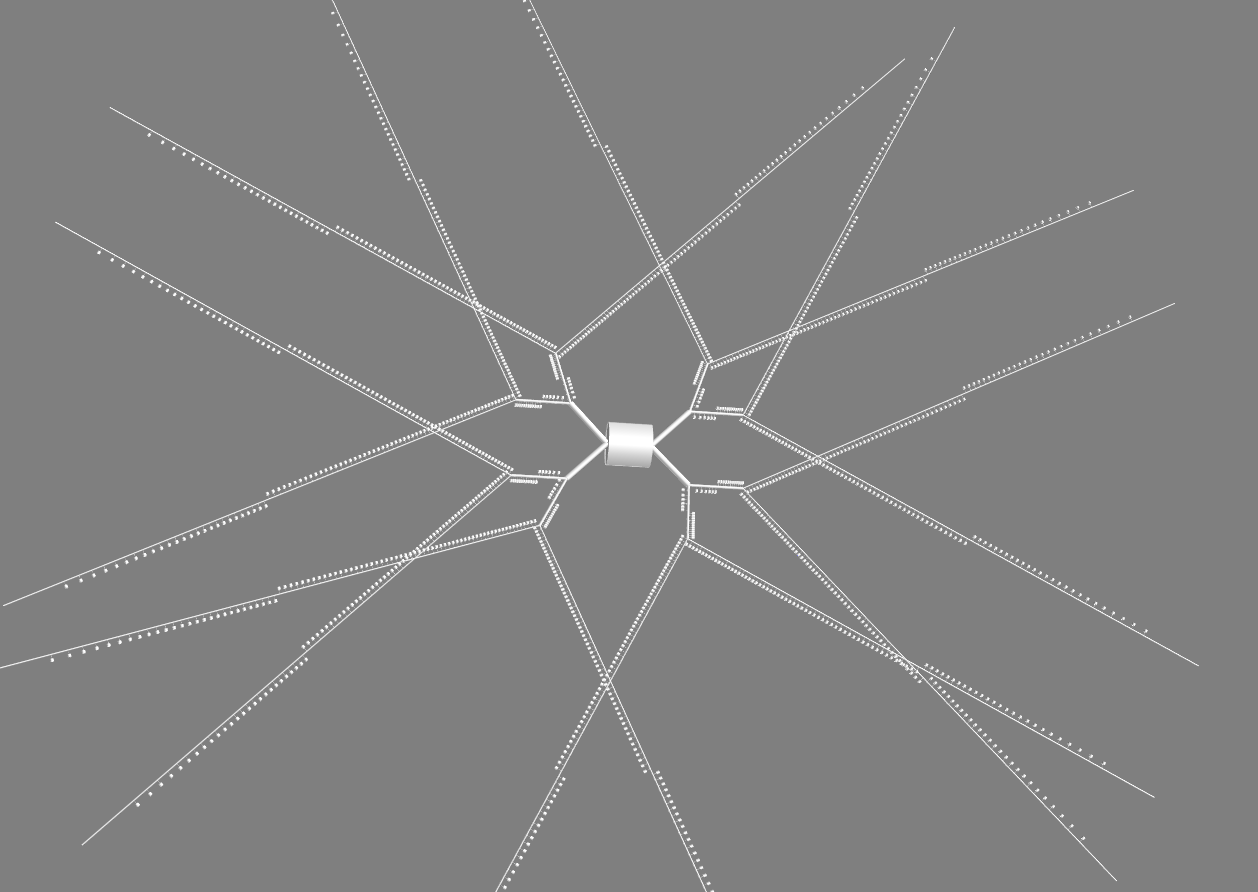
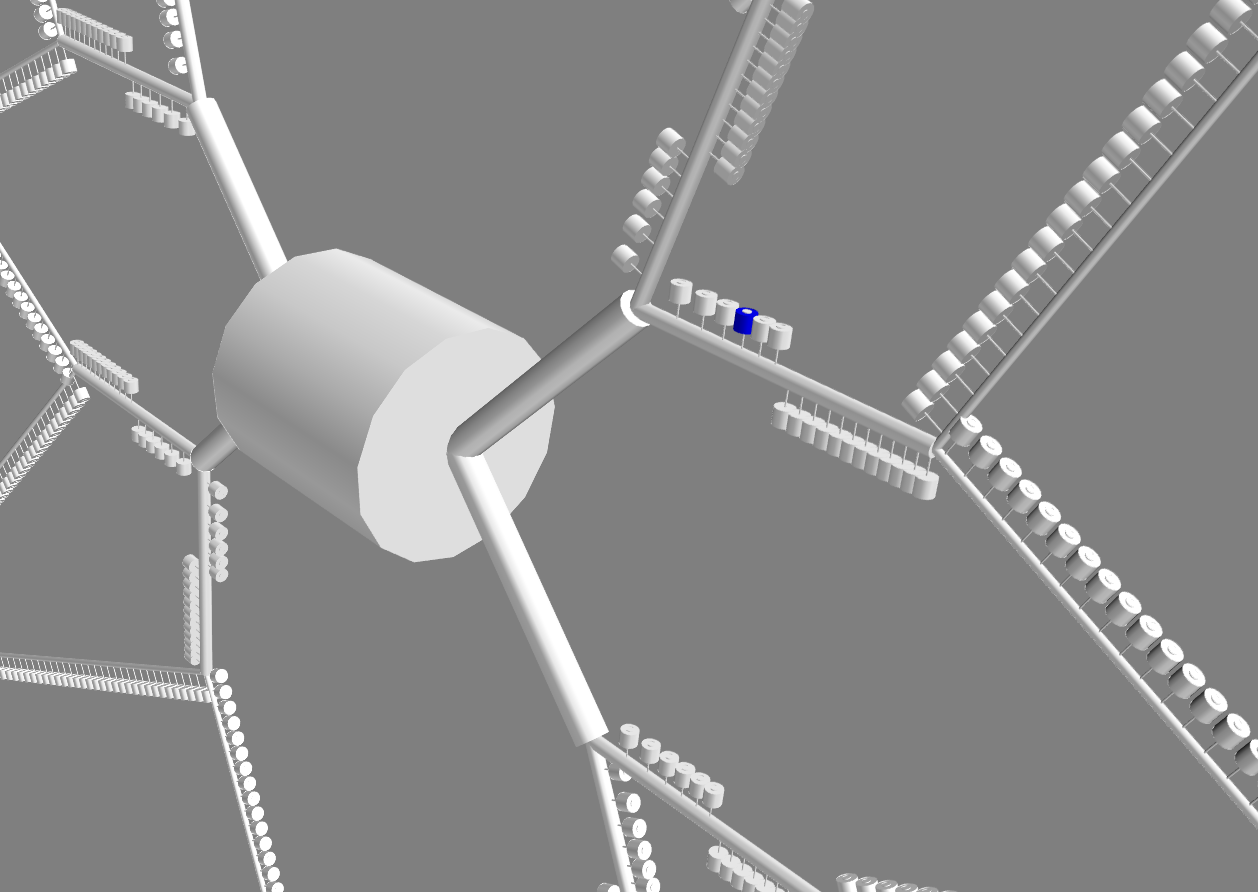
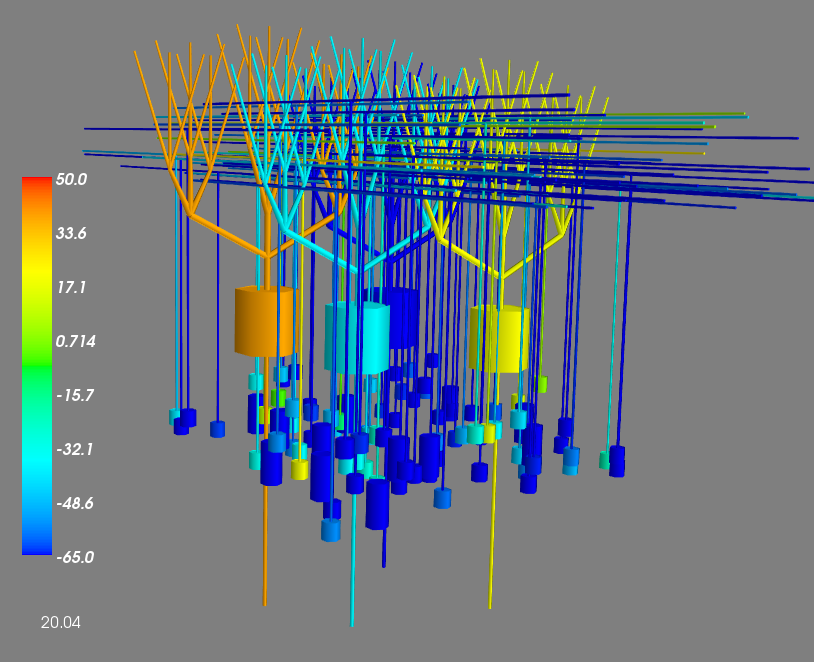
Medium Spiny Neuron with explicit spines modelled
There are more than 4000 sections in this model, where each spine is individually modelled and distributed on the MSN body.
A zoomed version, with one spine’s head selected.
Pylab integration
It is possible to use the standard pylab tool and to plot the timecourses in the current figure, or create a new one just selecting another output figure number.
Network example
Neuronvisio can handle the visualization of networks. For example check out the Cerebellum Networks example, ported to NEURON with neuroConstruct.
This Cerebellum Network example is shipped with Neuronvisio code.
Making a movie
To make a movie it is possible to call the function neuronvisio.controls.Controls.make_animation_screenshots:
controls.make_animation_screenshots(time_start, time_stop=None,
                                    saving_dir='anim')
which will save all the screenshots in brand new directory (default is anim). To stack them in a movie, you can use ffmpeg with the following command:
ffmpeg -f image2 -r 10 -i %09d.png -sameq anim.mov -pass 2
One of the example video, using the pyrimidal neuron can be seen here: http://www.youtube.com/watch?v=LOuptLKZ5rU